Tired of discovering your meticulously stored frozen foods covered in icy crystals, their once vibrant flavors dulled and textures compromised? You’re not alone. Freezer burn is a common kitchen adversary, but there’s a powerful tool to combat it: the vacuum sealer. For beginners looking to elevate their food preservation game, understanding how to effectively vacuum seal is a culinary superpower. This guide will walk you through everything you need to know, transforming you from a freezer burn victim to a food storage champion.
What is Freezer Burn and Why Does it Happen?
Freezer burn is the unwelcome sight of white or grayish-brown dry spots and ice crystals on frozen food. It primarily occurs when food is exposed to air within the freezer environment. The cold, dry air causes a process called sublimation, where ice crystals on the food’s surface turn directly into water vapor, bypassing the liquid state. This moisture loss leads to dehydration, altering the food’s texture, color, and flavor, rendering it unappetizing. While freezer-burned food is generally safe to eat, its quality is significantly diminished, making it a common cause of food waste.
How Vacuum Sealing Combats Freezer Burn
Vacuum sealing is your most effective weapon against freezer burn because it tackles the root cause: air exposure. A vacuum sealer removes almost all the air from around your food before hermetically sealing it in a specialized bag or container. This creates an anaerobic (oxygen-free) environment.
By eliminating air, vacuum sealing prevents the dehydration process that leads to freezer burn. No air means no moisture can escape from the food’s surface, and no dry freezer air can come into contact with it. The tight, airtight seal also protects against oxidation, another factor that degrades food quality over time. This method dramatically preserves the food’s natural moisture, color, flavor, and texture, keeping it fresh for significantly longer than traditional storage methods like zipper bags or plastic wrap.
The Multifaceted Benefits of Vacuum Sealing
Beyond preventing freezer burn, vacuum sealing offers a host of advantages that can transform your kitchen habits and save you money.
Extend Food Shelf Life
|
Our Picks for the Best Vacuum sealer in 2026
As an Amazon Associate I earn from qualifying purchases.
|
||
| Num | Product | Action |
|---|---|---|
| 1 | Bonsenkitchen Vacuum Sealer Machine, Globefish Technology for Perfect Vacuum Sealing, Powerful Low-Noise Food Vacuum Sealer with Easy Handle Design, Built-in Cutter & Bag Storage, 1 Bag Roll & 10 Bags |

|
| 2 | Gasbye 95kPa Precision Vacuum Sealer Machine, Double Heat Seal for Dry/Moist Food, Easy-Lock Handle, Built-in Bag Storage & Cutter, Progress Display, Pulse Mode, Removable Drip Tray, Silver |
|
| 3 | Vacuum Sealer Machine 75KPa Food with 6-in-1 Dry/Moist Modes & Digital Timer, Compact Lightweight Design, Built-in Cutter + 10 Bags (Black Silver) |
|
| 4 | 95Kpa Precision Pro Vacuum Sealer, with Double Heat Seal & Dual-Pump for Dry/Moist Food, 2X Strength, Food Vacuum Sealer Machine with Easy-Lock Handle, Built-in Cutter & Bag Storage, Stainless Steel |
|
| 5 | Potane Precision Vacuum Machine,Pro Food Sealer with Built-in Cutter and Bag Storage(Up to 20 Feet Length), Both Auto&Manual Options,2 Modes,Includes 2 Bag Rolls 11”x16’ and 8”x16’,Compact Design |
|
| 6 | Bonsenkitchen Vacuum Sealer Machine | Compact Food Sealer for Kitchen Storage & Meal Prep | Multiple Modes | External Vacuum System | 5 Bags, Silver |
|
| 7 | Food Vacuum Sealer Machine, 95KPa Powerful Food Saver with Dry/Moist/External Vacuum Modes, Built-in Cutter & Bag Storage, Single/Double Sealing, 1 Bag & 15 Pre-cut Bags |
|
| 8 | Vacuum Sealer Machine 95KPA Powerful Suction, 10s Fast Seal, Dry & Moist Modes, Compact Food Vacuum Sealer with 30 Bags Included, Automatic Food Saver for Meal Prep, Sous Vide & Kitchen Storage |
|
| 9 | Vacuum Sealer for Food, 95kPa Food Saver Vacuum Sealer Machine, 135W Fast-Sealing with Easy Tear Cutter, Built-in Bag Storage, 9-in-1 Compact Food Vacuum Sealer Machine with 10 ft Bag Roll |
|
| 10 | MegaWise Vacuum Sealer Machine | 80kPa Suction Power| Bags and Cutter Included | Compact One-Touch Automatic Food Sealer with External Vacuum System | Dry Moist Fresh Modes for All Saving needs |
|
By removing oxygen, vacuum sealing dramatically slows down the growth of spoilage-causing bacteria and mold, extending the shelf life of refrigerated, pantry, and frozen foods by up to five times compared to conventional storage methods. This means your fresh produce, meats, and leftovers stay good for much longer.
Preserve Flavor, Texture, and Nutrients
The absence of air in a vacuum-sealed package locks in the food’s natural flavors, colors, and textures. Nutrients are also better preserved, ensuring that when you’re ready to cook or reheat, your meals taste as fresh as the day they were prepared. No more bland, dry, or discolored frozen food.
Significantly Reduce Food Waste
Food waste is a major problem, both for your wallet and the environment. Vacuum sealing allows you to save leftovers, store bulk purchases, and keep seasonal ingredients fresh, drastically reducing the amount of food that ends up in the trash due to spoilage or freezer burn.
Save Money on Groceries
Buying groceries in bulk often comes with significant savings. With a vacuum sealer, you can confidently purchase larger quantities of meat, poultry, cheese, or vegetables, portion them, and store them without fear of spoilage. This strategic buying can lead to substantial savings over time.
Streamline Meal Preparation
Vacuum sealing is a game-changer for meal prep. You can portion out raw ingredients for future meals or seal batch-cooked dishes, making weeknight dinners quick and easy. Many people also use vacuum sealers for quick marination, as the vacuum pressure helps marinades penetrate food faster and more deeply.
Optimize Storage Space
Vacuum-sealed bags are compact and flexible, conforming to the shape of your food. This eliminates bulky air pockets, freeing up valuable space in your refrigerator, freezer, and pantry. Organizing your storage becomes a breeze, as clearly labeled, flat-packed items stack neatly.
Demystifying Vacuum Sealer Types for Home Use
When starting your vacuum sealing journey, you’ll encounter a few main types of machines. Understanding their differences will help you choose the best one for your needs.
External/Suction Vacuum Sealers
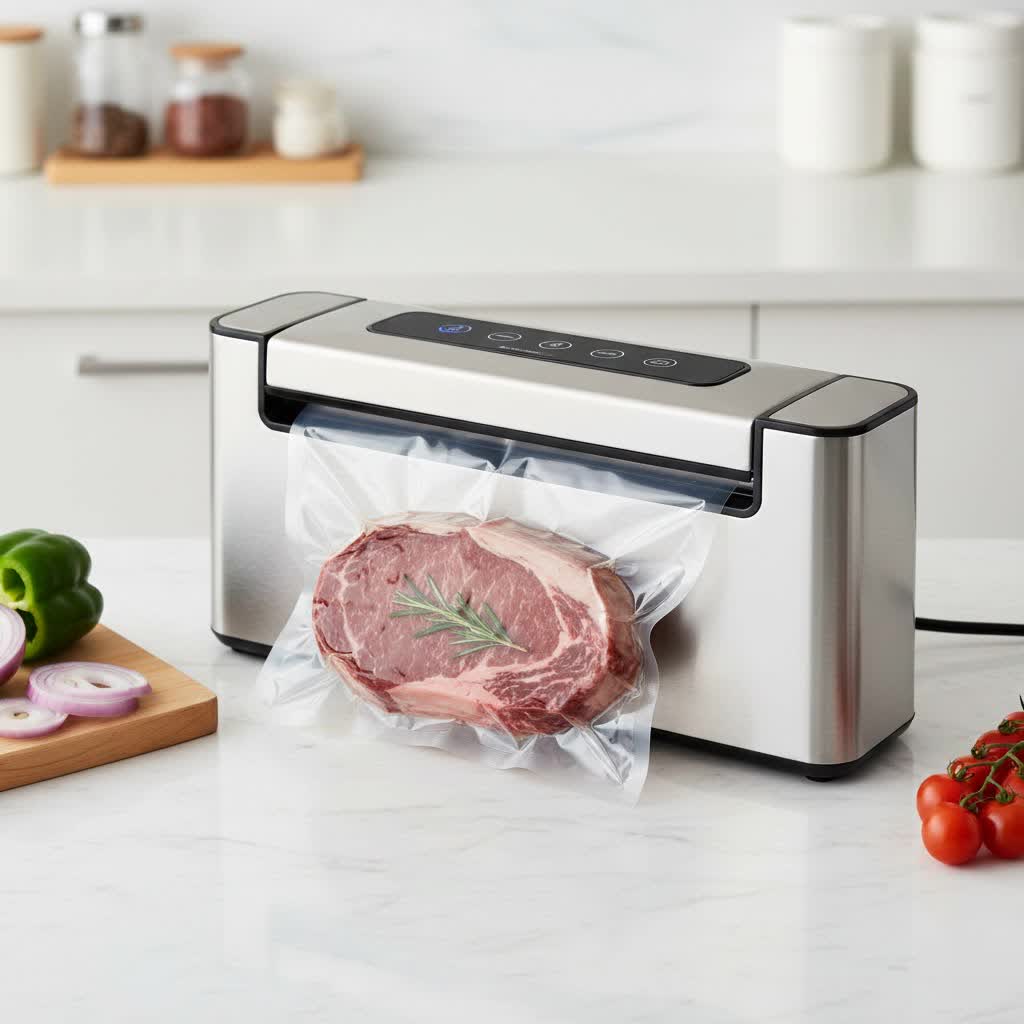
These are the most common type for home use and are excellent for beginners. They work by placing the open end of a specially designed textured bag into a chamber on the machine, which then suctions out the air and heat-seals the bag.
- Pros: Generally affordable, compact, easy to operate, versatile for various dry foods.
- Cons: Less effective with very moist or liquid-rich foods (which can be sucked into the machine), requires specific embossed/textured bags for proper air removal.
- Popular Brands for Beginners: FoodSaver, Nesco, and Mueller are often recommended for their user-friendliness and consistent performance.
Chamber Vacuum Sealers
While less common for beginners due to their higher price point and larger size, it’s good to know they exist. These machines enclose the entire bag within a chamber, then remove all the air from the chamber itself before sealing the bag.
- Pros: Excellent for liquids and moist foods (as there’s no pressure differential to draw liquids into the seal), creates a very strong, consistent seal, can use smoother, more affordable bags.
- Cons: Significantly more expensive, bulky, and generally suited for commercial or heavy-duty home use.
Handheld Vacuum Sealers
These compact, battery-operated devices are designed for quick sealing of specific containers or zipper-style vacuum bags.
- Pros: Highly portable, convenient for quick daily use, good for dry snacks or items frequently accessed.
- Cons: Less powerful suction than external sealers, typically require specific brand-compatible bags/containers, and are not ideal for long-term freezer storage of most meats or larger items.
Choosing Your First Vacuum Sealer: A Beginner’s Guide
Selecting your first vacuum sealer doesn’t have to be complicated. Consider these factors to find the perfect fit for your kitchen.
Assess Your Needs
- Frequency of Use: How often do you plan to vacuum seal? Occasional users might prefer a basic model, while frequent bulk buyers will benefit from a more robust machine.
- Types of Food: Do you primarily seal dry goods, or do you often freeze meats with marinades or moist produce? Some machines have “moist” settings to handle liquids better.
- Budget: Vacuum sealers range widely in price. Determine how much you’re willing to invest in the machine and the ongoing cost of bags.
Key Features to Look For
- Suction Power: A good vacuum sealer should remove most of the air efficiently.
- Dry/Moist Settings: Essential for sealing different food types without issues. The “moist” setting usually provides a shorter vacuum cycle to prevent liquids from being drawn into the seal.
- Automatic vs. Manual Operation: Automatic models simplify the process, while manual options (like a pulse feature) give you more control, especially for delicate foods.
- Built-in Cutter and Roll Holder: Convenient features for easily creating custom-sized bags from a roll.
- Removable Drip Tray: Makes cleaning up after sealing moist foods much easier.
- Compact Design: If kitchen counter space is limited, look for a smaller footprint or an upright design.
Top Brands for Beginners
Many reputable brands offer beginner-friendly vacuum sealers. The Nesco Deluxe VS-12 is frequently praised for its ease of use, consistent sealing, and reliable locking mechanism. The Mueller Vacuum Sealer is a popular budget-friendly choice known for its simplicity and good performance. FoodSaver remains a household name with various models, including versatile options like the FoodSaver Premiere Multi-Use, while the Anova Culinary Precision is often recommended for its sleek design and intuitive operation, especially if you’re interested in sous vide cooking.
Step-by-Step Guide to Vacuum Sealing Food
Ready to begin? Here’s a simple guide to get you started with your new vacuum sealer.
Preparing Your Food for Sealing
- Portioning: Divide food into desired serving sizes. This makes thawing and cooking more efficient.
- Pre-Freeze Moist Items: For very juicy foods like raw meats, stews, or marinated items, flash-freezing them on a tray for 1-2 hours until solid (or mostly solid) will prevent liquids from being sucked into the vacuum chamber and ensure a better seal.
- Pat Dry: Always pat foods like meat or fish thoroughly dry with a paper towel. Excess surface moisture can hinder the sealing process.
- Consider Freezing Softer Items: For delicate items like berries or bread, flash-freezing them first will help them retain their shape during the vacuum process.
Operating Your Vacuum Sealer
- Choose Your Bag: Use a bag specifically designed for vacuum sealing that is compatible with your machine (textured for external sealers). Ensure the bag is larger than your food, leaving at least 3-4 inches of empty space at the top for sealing.
- Place Food in Bag: Insert the food, making sure the sealing area at the top of the bag remains clean and dry. Avoid overfilling.
- Position Bag: Place the open end of the bag into the vacuum sealer’s drip tray or sealing channel, ensuring it’s flat and free of wrinkles.
- Close and Lock: Close the lid of your vacuum sealer and engage any locking mechanisms.
- Select Settings: Choose the appropriate setting (e.g., “dry” for solid foods, “moist” for slightly wet foods). If your machine has a “pulse” or “gentle” setting, use it for delicate items to prevent crushing.
- Vacuum and Seal: Initiate the vacuum and seal cycle. The machine will remove the air, then automatically heat-seal the bag.
- Release and Inspect: Once the cycle is complete, release the lid and remove your sealed bag. Check the seal to ensure it’s tight and complete.
Labeling and Storing
- Label and Date: This step is crucial! Use a permanent marker to clearly write the contents and the date on each bag. This helps you track freshness and rotate your inventory.
- Proper Freezer Storage: Store your vacuum-sealed items neatly in your freezer. Their compact shape allows for efficient stacking and organization.
Advanced Tips and Troubleshooting for Optimal Results
As you become more comfortable, these tips can help you get the most out of your vacuum sealer.
Maximizing Your Vacuum Seal
- Don’t Overfill: Leave ample space at the top of the bag to ensure a strong, clean seal. A common mistake is filling the bag too close to the sealing bar.
- Clean Sealing Area: Any food particles, grease, or moisture on the inside of the bag where the seal is made can compromise the airtightness. Wipe it clean before sealing.
- Pre-chill Foods: Chilling foods, especially meats, before sealing can help them hold their shape and reduce the chance of liquid being drawn into the seal channel.
- Use Vacuum Canisters: For delicate items like chips, baked goods, or liquids you don’t want to freeze, vacuum canisters or jars (with appropriate attachments) provide a perfect solution, preventing crushing and maintaining integrity.
Creative Uses Beyond the Freezer
Your vacuum sealer is not just for preventing freezer burn on raw meats.
- Marinating: Vacuum sealing significantly speeds up the marinating process by opening the pores of the food and forcing the marinade deep into the fibers.
- Sous Vide Cooking: Vacuum bags are essential for sous vide, allowing food to cook evenly in a temperature-controlled water bath.
- Pantry Dry Goods: Extend the life of coffee beans, flour, sugar, pasta, rice, nuts, and even crackers by vacuum sealing them. This also protects against pests.
- Non-Food Items: Protect important documents, silver, emergency supplies (like matches or bandages), or camping gear from moisture and corrosion.
Common Issues and Quick Fixes
- Poor Seal: If the bag isn’t sealing properly, check for wrinkles, moisture, or food particles on the sealing area. Ensure the heating element and sealing strips are clean and intact. You might need to try a different bag or reposition it.
- Not Vacuuming Fully: Make sure the lid is securely latched and the bag is correctly placed in the vacuum channel. Check for any punctures or tears in the bag itself.
- Liquids Being Drawn In: If you’re not flash-freezing, try pausing the vacuum cycle manually just before the liquid reaches the seal bar, then initiate the seal. Alternatively, fold a paper towel and place it near the top of the bag to absorb excess moisture before it reaches the seal.
DIY Vacuum Sealing Techniques (No Machine Required)
Even without a dedicated vacuum sealer, you can still achieve a decent level of air removal using simple household items. These methods won’t be as effective as a machine but are great for beginners or for occasional use.
The Water Displacement Method
This technique uses the pressure of water to push air out of a zipper-lock bag.
- Place your food in a high-quality, freezer-safe zipper-lock bag, leaving it mostly open.
- Slowly submerge the bag into a large bowl or sink full of water, allowing the water pressure to push the air out.
- Once the air is almost completely expelled, seal the bag just above the waterline.
- Carefully remove the sealed bag, dry it, and label it before freezing.
The Straw Method
For a more direct approach, you can use a straw to manually remove air.
- Place your food in a zipper-lock bag and seal it almost completely, leaving a small opening for a straw.
- Insert a straw into the small opening, ensuring it doesn’t touch the food.
- Suck the air out of the bag through the straw. As the bag collapses around the food, quickly remove the straw and seal the remaining opening.
Remember, these DIY methods offer a good temporary solution but typically don’t provide the same long-term protection against freezer burn as a dedicated vacuum sealer.
Conclusion
Vacuum sealing is a simple yet incredibly effective method for preserving food quality, extending shelf life, and preventing the dreaded freezer burn. By removing air, you safeguard your food’s flavor, texture, and nutritional value, minimizing waste and maximizing your grocery budget. Whether you opt for a beginner-friendly external sealer or explore manual techniques, taking the step to vacuum seal your food will revolutionize your kitchen. Say goodbye to unappetizing icy chunks and hello to perfectly preserved ingredients and meals, ready whenever you need them.
What will you vacuum seal first to conquer freezer burn in your kitchen?
Frequently Asked Questions
Is freezer-burned food safe to eat?
Yes, freezer-burned food is generally safe to eat. However, the quality, flavor, and texture will be significantly degraded due often to dehydration, making it less palatable.
Can I vacuum seal liquids?
While external vacuum sealers can struggle with liquids, you can flash-freeze liquids into a solid state before vacuum sealing them. Chamber vacuum sealers are specifically designed to handle liquids without issue. For external sealers, you can also use a “moist” setting, or manually stop the vacuum and seal before liquids are drawn into the machine, or use specific liquid-blocking accessories.
How long does food last when vacuum sealed in the freezer?
Vacuum sealing can extend the shelf life of frozen foods by 3 to 5 times compared to traditional storage methods. For example, meats that might last 6-12 months conventionally can last 2-3 years when vacuum sealed.
Do I need special bags for vacuum sealing?
Yes, external vacuum sealers require special embossed or textured bags that allow air to be drawn out through channels. Standard smooth plastic bags will not work effectively with most home vacuum sealers.
Can I reuse vacuum sealer bags?
It is generally not recommended to reuse vacuum sealer bags, especially if they contained raw meat, fish, or greasy foods due to food safety concerns and the potential for residual odors or bacteria. However, if bags contained dry, clean items and are thoroughly washed and dried, some users may reuse them, but the integrity of the seal might be compromised over time.