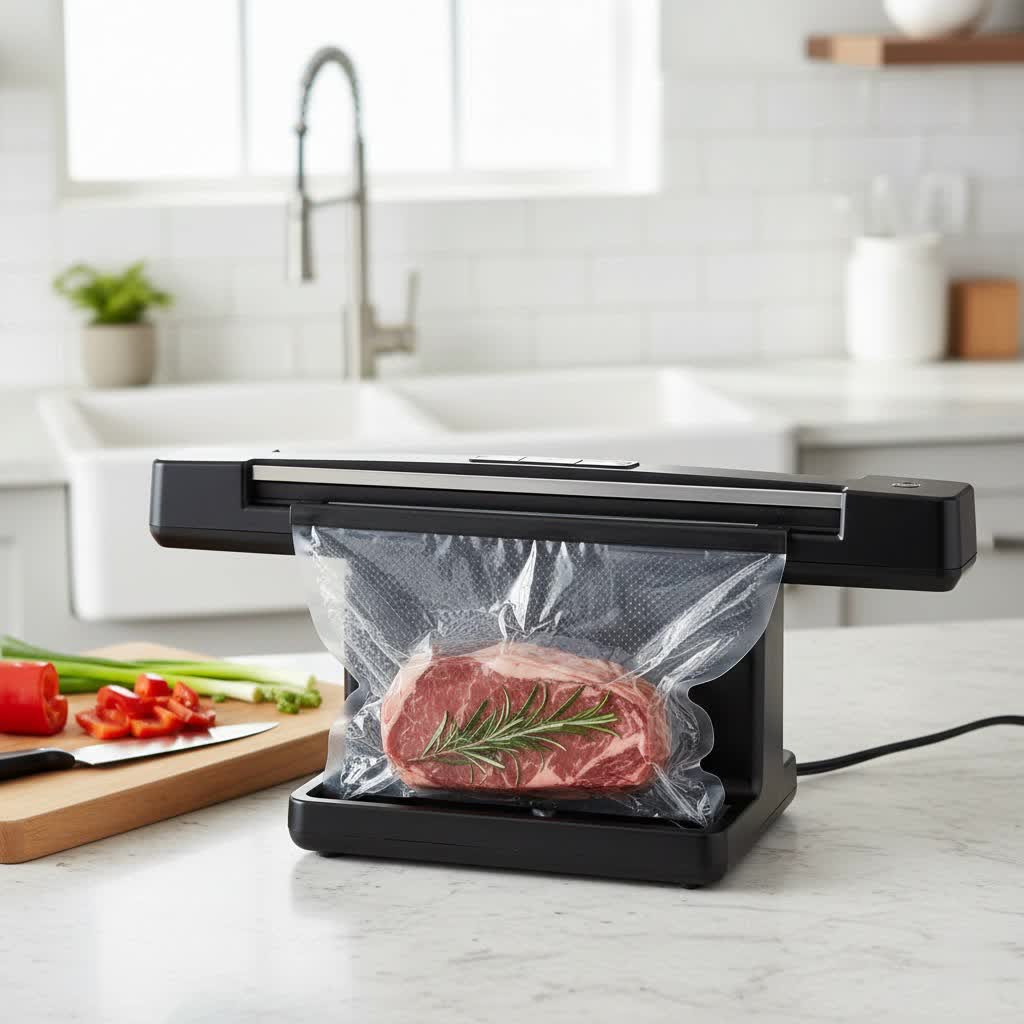
In a world where preserving our resources is more important than ever, knowing how to store pantry staples like rice and flour effectively can be a game-changer. These essential dry goods are susceptible to spoilage, pests, and loss of freshness over time. If you’ve ever opened a bag of flour only to find tiny invaders or wondered why your rice tastes a bit stale, you understand the frustration. Vacuum sealing offers a powerful solution, extending the shelf life of your dry goods dramatically while maintaining their quality. This guide will walk you through everything you need to know about vacuum sealing rice and flour, from understanding the benefits to mastering the techniques, ensuring your staples stay fresh for the long haul.
What is a Vacuum Sealer?
At its core, a vacuum sealer is a kitchen appliance designed to remove air from a package before sealing it. The fundamental principle is simple: by eliminating oxygen, you create an environment where the primary culprits of food spoilage—bacteria, mold, and oxidation—cannot thrive.
This method of food preservation has evolved significantly over time. While ancient civilizations used drying, salting, and fermenting, modern advancements like vacuum sealing offer an efficient and reliable way to keep food fresh. Unlike traditional storage methods that merely attempt to minimize air exposure, a vacuum sealer actively extracts the air, forming an airtight barrier that acts as a fortress against spoilage. This technology is not just for professional kitchens; it’s an invaluable tool for any home looking to optimize food storage, reduce waste, and ensure a ready supply of high-quality ingredients.
Benefits of Vacuum Sealing Dry Goods
Vacuum sealing dry goods like rice and flour offers a multitude of advantages that go beyond simple convenience, providing robust protection and extending usability.
Extend Shelf Life and Prevent Spoilage
|
Our Picks for the Best Vacuum sealer in 2026
As an Amazon Associate I earn from qualifying purchases.
|
||
| Num | Product | Action |
|---|---|---|
| 1 | Bonsenkitchen Vacuum Sealer Machine, Globefish Technology for Perfect Vacuum Sealing, Powerful Low-Noise Food Vacuum Sealer with Easy Handle Design, Built-in Cutter & Bag Storage, 1 Bag Roll & 10 Bags |

|
| 2 | Vacuum Sealer for Food, 95kPa Food Saver Vacuum Sealer Machine, 135W Fast-Sealing with Easy Tear Cutter, Built-in Bag Storage, 9-in-1 Compact Food Vacuum Sealer Machine with 10 ft Bag Roll |
|
| 3 | Vacuum Sealer Machine 95KPA Powerful Suction, 10s Fast Seal, Dry & Moist Modes, Compact Food Vacuum Sealer with 30 Bags Included, Automatic Food Saver for Meal Prep, Sous Vide & Kitchen Storage |
|
| 4 | MegaWise Vacuum Sealer Machine | 80kPa Suction Power| Bags and Cutter Included | Compact One-Touch Automatic Food Sealer with External Vacuum System | Dry Moist Fresh Modes for All Saving needs |
|
| 5 | Vacuum Sealer Machine 75KPa Food with 6-in-1 Dry/Moist Modes & Digital Timer, Compact Lightweight Design, Built-in Cutter + 10 Bags (Black Silver) |
|
| 6 | Bonsenkitchen Vacuum Sealer Machine | Compact Food Sealer for Kitchen Storage & Meal Prep | Multiple Modes | External Vacuum System | 5 Bags, Silver |
|
| 7 | Food Vacuum Sealer Machine, 95KPa Powerful Food Saver with Dry/Moist/External Vacuum Modes, Built-in Cutter & Bag Storage, Single/Double Sealing, 1 Bag & 15 Pre-cut Bags |
|
| 8 | Gasbye 95kPa Precision Vacuum Sealer Machine, Double Heat Seal for Dry/Moist Food, Easy-Lock Handle, Built-in Bag Storage & Cutter, Progress Display, Pulse Mode, Removable Drip Tray, Silver |
|
| 9 | Potane Precision Vacuum Machine,Pro Food Sealer with Built-in Cutter and Bag Storage(Up to 20 Feet Length), Both Auto&Manual Options,2 Modes,Includes 2 Bag Rolls 11”x16’ and 8”x16’,Compact Design |
|
| 10 | 95Kpa Precision Pro Vacuum Sealer, with Double Heat Seal & Dual-Pump for Dry/Moist Food, 2X Strength, Food Vacuum Sealer Machine with Easy-Lock Handle, Built-in Cutter & Bag Storage, Stainless Steel |
|
The most compelling benefit of vacuum sealing is its ability to significantly extend the shelf life of dry goods. By removing oxygen, you halt the oxidation process, which is responsible for flavors turning stale and nutrients degrading. Flour, for instance, can typically last a few months in its original packaging, but vacuum-sealed, its shelf life can extend to a year or more. Rice, a true long-term storage champion, can last for decades when properly vacuum-sealed, far surpassing its conventional storage limits. This means less frequent trips to the store and greater peace of mind knowing your staples are ready when you need them.
Protect Against Pests and Contaminants
Few things are as disheartening as discovering pantry pests in your dry goods. Weevils, moths, and other insects are attracted to grains and flours, laying eggs that can quickly infest an entire supply. An airtight, vacuum-sealed package creates an impenetrable barrier, completely safeguarding your food from these unwelcome guests. Beyond insects, the seal also protects against moisture absorption, which can lead to clumping, mold growth, and further spoilage. This protective shield ensures your food remains clean, safe, and ready for consumption.
Preserve Flavor, Nutrition, and Texture
Air and moisture are not only vectors for spoilage but also enemies of quality. Exposure to these elements can strip dry goods of their natural flavor, alter their texture, and diminish their nutritional value. Imagine rice that cooks up perfectly, retaining its distinct aroma and firm texture, or flour that bakes into light, fluffy bread every time. Vacuum sealing locks in the original freshness, ensuring that the rice and flour you use months or even years down the line taste as good and perform as well as they did the day you bought them. This preservation of quality is crucial for home bakers and cooks who value the integrity of their ingredients.
Optimize Storage Space
Vacuum sealing dramatically reduces the bulk of original packaging, especially for items stored in flexible bags. By removing air, vacuum-sealed bags become compact and flat, making them incredibly efficient to store. This space-saving benefit is particularly valuable for those who buy in bulk or have limited pantry space. You can neatly stack bags or jars, transforming cluttered shelves into an organized, efficient food storage system. This optimization allows you to store more food in the same area, which is ideal for emergency preparedness or simply managing a larger household.
Reduce Food Waste
Food waste is a significant global issue, and much of it stems from spoilage at home. By extending the usability of your dry goods, vacuum sealing directly contributes to reducing waste. When rice and flour stay fresh longer, you are less likely to discard them due to staleness, insect infestation, or moisture damage. This not only benefits the environment but also saves you money in the long run, as you’ll be maximizing the value of every purchase.
Types of Vacuum Sealers for Dry Goods
Choosing the right vacuum sealer depends on your specific needs, budget, and the volume of dry goods you plan to preserve. Each type offers distinct advantages.
External Vacuum Sealers (Bags)
These are the most common and widely used vacuum sealers, ideal for beginners and everyday home use. They work by placing the open end of a specially designed textured bag into the machine, which then suctions out the air and heat-seals the bag shut.
- Pros: Generally affordable, versatile for various food types (including dry goods, meats, and liquids), and easy to use. Many models offer specific settings for dry or moist food.
- Cons: Require proprietary bags, which can add to ongoing costs. Powdery dry goods like flour can be challenging to seal directly in bags without special precautions, as fine particles can be drawn into the machine, potentially damaging it.
- Popular Features: Pulse vacuum function for delicate items, built-in bag cutters, roll storage.
Jar Vacuum Sealers (Attachments)
Many external vacuum sealers come with or can be fitted with attachments specifically designed for vacuum sealing mason jars. This method involves placing a special lid and attachment on a jar, then connecting it to the vacuum sealer’s accessory port.
- Pros: Excellent for powdery dry goods as the jar contains the particles, preventing damage to the sealer. Jars are reusable, sturdy, and provide a clear view of contents. Ideal for “use-as-you-go” items like flour or spices, as you can re-seal the jar after each use.
- Cons: Requires compatible jars and special reusable lids. Slower than sealing multiple bags.
- Popular Features: Compatible with standard and wide-mouth mason jars, handheld options for quick seals.
Chamber Vacuum Sealers
Considered the gold standard for vacuum sealing, chamber sealers are typically larger, more expensive, and primarily used in commercial settings or by serious home preppers. The entire bag or container is placed inside a chamber, and the air is removed from the entire chamber, not just the bag.
- Pros: Can seal liquids without spillage, handle powdery dry goods without issues, and use less expensive, smooth bags. Creates a stronger vacuum seal.
- Cons: Significant upfront cost, large footprint, not practical for most home users.
| Feature | External Vacuum Sealer | Jar Vacuum Sealer (Attachment) | Chamber Vacuum Sealer |
|---|---|---|---|
| Cost | Low to Moderate | Low (attachment cost), Moderate (sealer cost) | High |
| Primary Use | Bags (dry, moist, delicate foods) | Jars (dry goods, liquids, everyday pantry staples) | Bags & Containers (all food types, high volume) |
| Dry Goods Suitability | Good (with precautions for powders) | Excellent (prevents powder contamination) | Excellent (no issue with powders or liquids) |
| Packaging | Proprietary textured bags | Mason jars with reusable lids | Smooth, inexpensive bags; compatible containers |
| Space Saving | High (flat bags) | Moderate (jars take up vertical space) | Moderate (machine itself is large) |
| Speed | Fast for multiple bags | Slower (one jar at a time) | Fast, efficient for many items |
| Durability | Varies by model | Jars are sturdy, attachment is simple | Built for heavy-duty use |
Step-by-Step Guide: Vacuum Sealing Rice and Flour
Successfully vacuum sealing dry goods requires a few important preparatory steps and specific techniques to ensure longevity and protect your equipment.
Preparing Your Dry Goods
Before you seal, a little preparation goes a long way in maximizing the effectiveness and preventing issues.
- Freeze First (Highly Recommended): Dry goods like rice and flour can naturally contain microscopic insect eggs or larvae. To eliminate these potential pests, it’s highly recommended to freeze your rice or flour for at least 3-5 days before vacuum sealing. This kills any existing insect life. After freezing, allow the goods to come back to room temperature before sealing to prevent condensation inside the package.
- Ensure Complete Dryness: Any residual moisture can lead to mold growth, even in a vacuum-sealed environment. Make absolutely certain that your rice and flour are completely dry before packaging.
- Clean Containers: Whether using bags or jars, ensure they are thoroughly clean and dry. For jars, sterilizing them (e.g., in a hot oven or boiling water) and allowing them to cool completely can offer an extra layer of protection, particularly for very long-term storage.
Method 1: Vacuum Sealing in Jars (Ideal for Powdery Goods)
Sealing dry goods in jars is an excellent option, especially for flour, as it prevents fine particles from damaging your vacuum sealer.
- Fill the Jar: Pour your rice or flour into a clean, dry mason jar. Leave at least an inch of headspace from the rim to allow for proper sealing.
- Clean the Rim: Wipe the rim of the jar thoroughly to remove any dust or food particles. A clean rim is crucial for an airtight seal.
- Place the Lid: Put a new, flat metal canning lid on top of the jar (do not use the ring at this stage).
- Attach the Accessory: Place the jar sealer attachment over the lid and jar. Connect the attachment hose to your vacuum sealer’s accessory port.
- Vacuum and Seal: Follow your vacuum sealer’s instructions for using the accessory port. The machine will draw air out of the jar. You’ll hear a distinct pop or click when the lid seals properly.
- Check the Seal: Remove the attachment. Gently try to lift the lid with your fingers. If it’s properly sealed, it will be firmly attached and not move. For added security, you can place a jar ring over the lid, but do not overtighten it.
- Label and Store: Label your jar with the contents and date. Store in a cool, dark, dry place.
Method 2: Vacuum Sealing in Bags (with the Paper Bag Trick)
This method is suitable for rice and can also be adapted for flour using a clever trick to protect your machine.
- Measure and Portion: Portion your rice or flour into a vacuum sealer bag, leaving several inches of space at the top for sealing.
- The Paper Bag Trick (for Powders like Flour): If sealing flour or other fine powders, place the flour inside a small brown paper bag (like a lunch bag or a folded piece of parchment paper) before putting it into the vacuum sealer bag. This barrier prevents fine particles from being sucked into the vacuum sealer’s motor, which can cause damage or a poor seal. You can even fold the top of the paper bag and secure it with a piece of masking tape to keep the powder contained.
- Position the Bag: Place the open end of the vacuum sealer bag into the sealing channel of your machine. Ensure it’s flat and free of wrinkles.
- Vacuum and Seal: Close the lid of your vacuum sealer and select the appropriate setting (usually “Dry” and “Normal”). The machine will extract the air and then automatically heat-seal the bag.
- Check the Seal: Inspect the seal line to ensure it’s complete and unbroken. The bag should be tightly compressed around the contents. If the seal looks incomplete, simply cut off the old seal and re-seal the bag.
- Label and Store: Label the bag with the contents and date, then store it in a cool, dark, dry place, ideally in a rigid container (like a food-grade bucket) for added protection against rodents.
Enhancing Longevity with Oxygen Absorbers
While vacuum sealing removes most of the air, it doesn’t eliminate 100% of the oxygen. For truly long-term storage (many years or decades), especially for commodities like rice, incorporating oxygen absorbers into your vacuum-sealed bags or jars is highly recommended. These small packets absorb any residual oxygen, creating an almost oxygen-free environment, further preventing oxidation and inhibiting the growth of even anaerobic bacteria. When using oxygen absorbers, ensure the vacuum seal is strong, as any leak will render the absorber ineffective.
Buying Guide: Choosing the Right Vacuum Sealer
Selecting the best vacuum sealer for your needs involves considering several factors beyond just price. Your usage habits and the types of foods you’ll seal should guide your decision.
Assess Your Needs
Before diving into models, ask yourself:
- Quantity of Food: Do you primarily seal small batches for weekly meal prep, or are you buying in bulk and stocking up for months or years?
- Frequency of Use: Will you use it daily, weekly, or just occasionally for seasonal harvests?
- Type of Food: While this guide focuses on dry goods, consider if you’ll also be sealing moist foods, marinated meats, or delicate items, as some sealers offer specialized settings.
Key Features to Consider
- Suction Power: A stronger vacuum ensures more air is removed, leading to a better and longer-lasting seal. Look for machines with powerful pumps.
- Dry/Moist Food Settings: These settings adjust the vacuum pressure and seal time to accommodate different food types. A “dry” setting is ideal for rice and flour, while a “moist” setting prevents liquids from being sucked into the machine.
- Jar Sealing Capability: If you plan to use mason jars for dry goods, ensure the model you choose has an accessory port and comes with or is compatible with a jar sealer attachment.
- Durability and Build Quality: A robust machine will withstand frequent use. Stainless steel construction often indicates better durability than all-plastic models.
- Bag Compatibility: Most external sealers require specific embossed bags. Check the cost and availability of these bags for the model you’re considering. Chamber sealers use more affordable smooth bags.
- Ease of Use and Cleaning: Look for intuitive controls, easy bag alignment, and removable drip trays for hassle-free cleanup.
- Noise Level: Some vacuum sealers can be quite noisy during operation. If you’ll be using it frequently, a quieter model might be a priority.
- Pulse Function: This manual control allows you to stop the vacuum process at any time, preventing crushing of delicate items like crackers or sensitive dry goods.
- External Hose Port: Essential for jar sealing and using other vacuum canisters.
Recommended Brands
Based on user reviews and expert testing, several brands consistently rank high for performance and reliability.
- Nesco Deluxe VS-12: Often cited as a top performer for its reliable sealing, convenient design, and range of functions, suitable for most users.
- FoodSaver: A widely recognized brand with many models, including external sealers with jar attachment capabilities and handheld versions. The FoodSaver V4400 or Premiere Multi-Use are often praised for versatility.
- Anova Precision Vacuum Sealer: Known for excellent sealing quality and user experience, often ranking high in tests.
- Mueller Vacuum Sealer: A good option for those on a tighter budget, offering solid performance for its price point.
When selecting, compare features and read recent reviews to find a model that aligns with your specific needs and budget.
Tips for Effective Vacuum Sealing and Storage
Achieving optimal results with vacuum sealing extends beyond the sealing process itself. Proper planning and post-sealing care are equally important.
Proper Bag and Jar Selection
- Vacuum Sealer Bags: Always use bags specifically designed for vacuum sealing. These bags have a textured surface or channels that allow air to be drawn out efficiently. Avoid using regular freezer bags, as they won’t provide an airtight seal. For long-term storage, opt for thicker, multi-ply bags that are puncture-resistant. Mylar bags are an excellent choice for ultimate long-term storage, especially when combined with oxygen absorbers and vacuum sealing, offering superior light and oxygen barriers.
- Mason Jars: For jar sealing, use only standard Mason-style canning jars with compatible metal lids. Ensure the lids are new and free from dents or imperfections, as a compromised lid can prevent a proper seal. Reusing lids that have already been heat-processed for canning is not recommended for vacuum sealing, as their sealing compound may be weakened.
Ideal Storage Conditions
Once your dry goods are vacuum-sealed, their storage environment plays a crucial role in maintaining their extended shelf life.
- Cool, Dark, and Dry: Regardless of how well they’re sealed, store your rice and flour in a cool, dark, and dry location. Extreme temperatures, humidity, and direct sunlight can degrade food quality over time. A pantry, cellar, or cool closet is ideal.
- Rodent Protection: While vacuum-sealed bags are excellent barriers against insects, they are not impervious to rodents. For long-term storage, especially for items in bags, consider placing your vacuum-sealed goods inside sturdy, food-grade plastic containers or metal bins. This provides an additional layer of protection against mice and other pests that could chew through bags.
- Elevated Storage: Storing food off the floor can help protect against potential flooding or moisture accumulation, as well as making it harder for pests to access.
Common Mistakes to Avoid
- Powder in the Sealing Area: Forgetting to use the “paper bag trick” when sealing flour can lead to fine particles being sucked into the vacuum sealer, damaging the pump or preventing a proper seal. Always create a barrier for powdery items.
- Overfilling Bags or Jars: Leaving insufficient headspace can prevent the sealer from creating a strong vacuum or a proper seal. Follow the recommended headspace guidelines.
- Wet Sealing Area: Any moisture on the sealing strip of your machine or on the rim of a jar can interfere with the heat seal, leading to a failed seal. Always ensure all surfaces are completely dry.
- Not Pre-Treating Grains: Skipping the freezing step for rice and flour can mean that existing insect eggs hatch later, even in a sealed environment, ruining your stored goods.
- Ignoring the Seal Check: Always physically check the seal on your bags or jars. A weak or incomplete seal negates all your preservation efforts.
- Sealing Brown Rice Long-Term: Brown rice contains oils that can go rancid over very long periods, even when vacuum-sealed. White rice is generally preferred for decades-long storage.
By adhering to these tips, you’ll maximize the benefits of vacuum sealing, ensuring your rice and flour remain pristine and ready for use whenever you need them.
Conclusion
Vacuum sealing rice and flour is a straightforward yet highly effective method for extending their shelf life, protecting them from pests and moisture, and preserving their quality. Whether you’re a seasoned prepper or simply looking to manage your pantry more efficiently, integrating a vacuum sealer into your kitchen arsenal offers substantial benefits. From the simple elegance of jar sealing for everyday use to the robust protection of bags with oxygen absorbers for long-term reserves, the techniques are accessible and rewarding. By following the guidelines for preparation, sealing, and storage, you can confidently keep your essential dry goods fresh, flavorful, and free from spoilage for years to come. Isn’t it time you took control of your pantry and embraced the peace of mind that comes with perfectly preserved staples?
Frequently Asked Questions
Can you vacuum seal flour directly in a vacuum sealer bag?
Yes, but it’s crucial to use a small brown paper bag or a folded piece of parchment paper as a barrier inside the vacuum sealer bag. This prevents fine flour particles from being drawn into the vacuum sealer’s pump, which can damage the machine or create an incomplete seal.
How long do vacuum-sealed rice and flour last?
Vacuum-sealed flour can last up to a year or more, compared to a few months in its original packaging. White rice, when properly vacuum-sealed and stored in cool, dark conditions, can last for 10-20 years, or even longer, especially with the addition of oxygen absorbers.
Is freezing rice and flour necessary before vacuum sealing?
It is highly recommended to freeze rice and flour for 3-5 days before vacuum sealing. This step kills any microscopic insect eggs or larvae that might naturally be present in the grains, preventing infestations that could ruin your stored food, even in an airtight environment.
Do I need oxygen absorbers if I vacuum seal dry goods?
While vacuum sealing removes most of the oxygen, it doesn’t remove 100%. For truly long-term storage (many years or decades), especially for rice, adding an oxygen absorber to your vacuum-sealed bag or jar is an excellent additional step to eliminate residual oxygen and further extend shelf life.
Can I reuse vacuum sealer bags for dry goods?
Some vacuum sealer bags are designed to be reusable after being washed, but it’s generally recommended to use new bags for long-term food storage to ensure the integrity of the seal and prevent cross-contamination. Jar lids for vacuum sealing are typically reusable if they remain in good condition.