Preserving food through vacuum sealing is a cornerstone of modern kitchen efficiency, keeping ingredients fresh longer and preventing freezer burn. Yet, few things are as frustrating as a vacuum sealer that suddenly refuses to pull air, leaving you with partially sealed bags and wasted efforts. If your trusty food preservation tool is acting up and failing to create a proper vacuum, don’t despair. Most suction issues are common and can be easily remedied with a few straightforward troubleshooting steps. This guide will walk you through the most frequent culprits behind poor vacuum performance and provide practical solutions to get your machine back to optimal working order, ensuring your food stays perfectly preserved.
Understanding Your Vacuum Sealer: The Basics
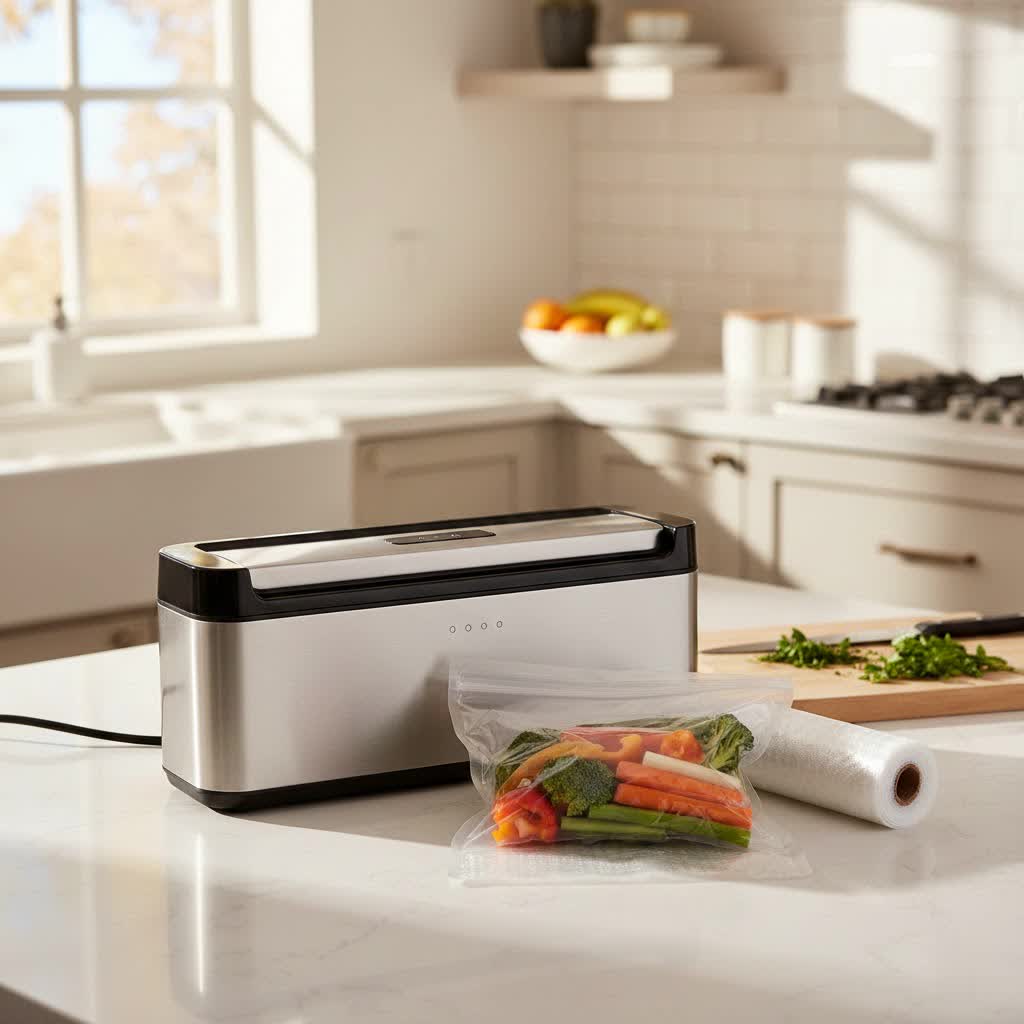
A vacuum sealer works by removing air from a specially designed bag or container and then sealing it, creating an airtight environment. This process dramatically slows down spoilage by inhibiting the growth of bacteria and mold, which require oxygen to thrive. The core components involved in this process are the vacuum pump, which extracts air; the sealing strip, which creates a heat seal; and the gaskets, which form a crucial airtight chamber around the bag during the vacuuming phase. When any of these components are compromised, the machine’s ability to suction properly is affected.
Why Your Vacuum Sealer Might Be Losing Suction
Several factors can lead to a vacuum sealer losing its suction power, ranging from simple user errors to component wear. Identifying the root cause is the first step toward a successful fix.
Common Problems Leading to Poor Suction
- Dirty or Damaged Gaskets: These rubber or foam seals are vital for creating a vacuum chamber. If they are dirty, cracked, dry, or flattened, air will leak in, preventing proper suction.
- Incorrect Bag Placement: The bag’s open end must be perfectly positioned within the vacuum channel for the machine to draw out air effectively.
- Leaking or Incompatible Bags: A punctured bag or one not designed for vacuum sealing will not hold a vacuum.
- Food Debris in the Vacuum Channel or Seal Area: Even small particles can obstruct airflow or prevent the lid from sealing completely.
- Excessive Moisture or Liquids: Liquids drawn into the vacuum pump can impede suction and potentially damage the machine.
- Overheating: Prolonged use can cause some machines to overheat, triggering a safety shut-off that temporarily reduces or eliminates suction.
- Lid Not Fully Latched: The vacuum sealer’s lid must be securely closed and latched for the vacuum pump to engage and create a proper seal.
|
Our Picks for the Best Vacuum sealer in 2026
As an Amazon Associate I earn from qualifying purchases.
|
||
| Num | Product | Action |
|---|---|---|
| 1 | 95Kpa Precision Pro Vacuum Sealer, with Double Heat Seal & Dual-Pump for Dry/Moist Food, 2X Strength, Food Vacuum Sealer Machine with Easy-Lock Handle, Built-in Cutter & Bag Storage, Stainless Steel |

|
| 2 | Bonsenkitchen Vacuum Sealer Machine, Globefish Technology for Perfect Vacuum Sealing, Powerful Low-Noise Food Vacuum Sealer with Easy Handle Design, Built-in Cutter & Bag Storage, 1 Bag Roll & 10 Bags |
|
| 3 | Gasbye 95kPa Precision Vacuum Sealer Machine, Double Heat Seal for Dry/Moist Food, Easy-Lock Handle, Built-in Bag Storage & Cutter, Progress Display, Pulse Mode, Removable Drip Tray, Silver |
|
| 4 | Vacuum Sealer Machine 75KPa Food with 6-in-1 Dry/Moist Modes & Digital Timer, Compact Lightweight Design, Built-in Cutter + 10 Bags (Black Silver) |
|
| 5 | Bonsenkitchen Vacuum Sealer Machine | Compact Food Sealer for Kitchen Storage & Meal Prep | Multiple Modes | External Vacuum System | 5 Bags, Silver |
|
| 6 | Food Vacuum Sealer Machine, 95KPa Powerful Food Saver with Dry/Moist/External Vacuum Modes, Built-in Cutter & Bag Storage, Single/Double Sealing, 1 Bag & 15 Pre-cut Bags |
|
| 7 | MegaWise Vacuum Sealer Machine | 80kPa Suction Power| Bags and Cutter Included | Compact One-Touch Automatic Food Sealer with External Vacuum System | Dry Moist Fresh Modes for All Saving needs |
|
| 8 | Vacuum Sealer for Food, 95kPa Food Saver Vacuum Sealer Machine, 135W Fast-Sealing with Easy Tear Cutter, Built-in Bag Storage, 9-in-1 Compact Food Vacuum Sealer Machine with 10 ft Bag Roll |
|
| 9 | Potane Precision Vacuum Machine,Pro Food Sealer with Built-in Cutter and Bag Storage(Up to 20 Feet Length), Both Auto&Manual Options,2 Modes,Includes 2 Bag Rolls 11”x16’ and 8”x16’,Compact Design |
|
| 10 | Vacuum Sealer Machine 95KPA Powerful Suction, 10s Fast Seal, Dry & Moist Modes, Compact Food Vacuum Sealer with 30 Bags Included, Automatic Food Saver for Meal Prep, Sous Vide & Kitchen Storage |
|
Step-by-Step Troubleshooting for Suction Issues
Addressing a vacuum sealer that won’t suction properly typically involves a series of checks and minor adjustments. Follow these steps methodically to diagnose and resolve the problem.
1. Inspect and Clean the Gaskets
Gaskets are the most common culprit for a lack of suction. They create the airtight seal necessary for the vacuum pump to operate.
- Locate the Gaskets: Most vacuum sealers have at least one upper and one lower gasket.
- Clean Thoroughly: Use a damp cloth to wipe away any food particles, dust, or moisture. Even a tiny crumb can break the seal.
- Check for Damage: Look for cracks, tears, flattening, or dryness. If a gasket is visibly damaged, it likely needs replacement.
- Realign or Flip: Some gaskets can be carefully removed, flipped over, and reinserted. This can sometimes restore their sealing ability if they’ve become compressed.
- Replacement: If gaskets are severely damaged and not replaceable by flipping, consult your machine’s manual for compatible replacement parts or contact the manufacturer.
“A common oversight, yet one of the most critical, is neglecting the condition of your vacuum sealer’s gaskets. They are the frontline defense against air leakage.” – Dr. Eleanor Vance, Food Preservation Technologist
2. Verify Bag Placement and Condition
The bag itself plays a crucial role in the vacuum sealing process. Improper bag handling can quickly lead to suction failures.
- Correct Positioning: Ensure the open end of the vacuum sealer bag lies completely flat and is positioned entirely within the vacuum channel. The bag edge should not extend beyond the channel, and there should be no wrinkles.
- Check for Leaks: Seal a bag with some air inside. Submerge it in water and gently apply pressure. If bubbles appear, the bag has a leak and needs to be replaced. Sharp food items (like bones or dry pasta) can puncture bags; consider wrapping them in a paper towel before sealing.
- Use Compatible Bags: Always use high-quality, textured vacuum sealer bags specifically designed for your machine. Generic or smooth bags may not allow air to be drawn out effectively by external vacuum sealers.
- Clean Bag Edges: Ensure the inside and outside edges of the bag are clean and dry, free from food residue, grease, or moisture, as these can compromise the seal.
3. Clear Blockages and Debris
Over time, food particles or debris can accumulate in the vacuum channel or port, hindering airflow.
- Inspect the Vacuum Channel: Carefully examine the channel where the bag sits for any visible food bits or obstructions.
- Clean the Port: Use a pipe cleaner, cotton swab, or even compressed air to clear any debris from the vacuum port or air intake area.
- Clean the Seal Bar: While primarily for sealing, a dirty seal bar can sometimes contribute to poor overall performance. Wipe it with a soft, damp cloth.
4. Manage Moisture and Liquids
Excessive moisture is a known enemy of vacuum sealers, especially those without a drip tray or a “moist food” setting.
- Pre-Freeze Moist Foods: For items like raw meats, fish, or juicy fruits, pre-freezing them for 1-2 hours before vacuum sealing can prevent liquids from being drawn into the vacuum pump.
- Use a Paper Towel Barrier: Place a folded paper towel at the top of the bag, just below the seal area, to absorb any residual moisture before it reaches the vacuum channel.
- Utilize Drip Tray (if applicable): If your model has a removable drip tray, ensure it’s clean and properly seated. Empty and clean it regularly to prevent liquid buildup.
5. Check for Overheating and Reset
Continuous operation can cause some vacuum sealers to overheat, leading to a temporary shutdown or reduced performance as a safety measure.
- Unplug and Cool Down: If your machine has been running for an extended period, unplug it for 10-15 minutes to allow it to cool down.
- Restart: Plug it back in and try again. This often resolves issues caused by thermal overload.
6. Ensure Proper Lid Closure
A vacuum sealer cannot create a vacuum if its lid isn’t completely sealed.
- Press Firmly: Apply firm, even pressure to both sides of the lid until it clicks securely into place.
- Check for Obstructions: Ensure no bag edges, food particles, or other items are preventing the lid from closing flush.
Advanced Considerations and Maintenance Tips
If the basic troubleshooting steps don’t resolve the suction issue, consider these additional points.
Advanced Diagnostics
- Test Without a Bag: Some FoodSaver models allow you to test the vacuum function without a bag. If the unit completes its cycle and the heat strip gets hot, the issue might still be bag or gasket related.
- Motor or Pump Issues: In rare cases, the vacuum pump motor itself might be failing. This usually manifests as unusual noises or a complete lack of vacuuming ability despite all other checks passing. If you suspect a motor issue, professional repair or replacement may be necessary.
Regular Maintenance for Optimal Performance
- Clean Regularly: Wipe down the vacuum channel, gaskets, and sealing strip after each use, especially when sealing moist foods.
- Inspect Gaskets Frequently: Make it a habit to check the gaskets for any signs of wear or damage.
- Store Properly: Store your vacuum sealer with the lid unlatched to prevent the gaskets from compressing and flattening over time.
Conclusion
A vacuum sealer that won’t suction properly is a common challenge, but it’s rarely a sign of irreparable damage. By systematically checking the gaskets, ensuring correct bag placement, managing moisture, and keeping the machine clean, you can resolve most issues and restore your sealer’s efficiency. Regular maintenance is your best defense against future problems, extending the lifespan of your appliance and ensuring your food preservation efforts remain seamless and effective. Don’t let a minor hiccup derail your food storage goals – a little attention to detail can keep your vacuum sealer working like new.
Frequently Asked Questions
Why is my vacuum sealer not pulling enough air?
The most common reasons for a vacuum sealer not pulling enough air include dirty or damaged gaskets, improper bag placement, or food debris blocking the vacuum channel. Ensure your gaskets are clean and intact, the bag is correctly positioned, and there are no obstructions in the vacuum path.
Can moisture affect my vacuum sealer’s suction?
Yes, absolutely. Excessive moisture or liquids can be drawn into the vacuum pump, reducing its efficiency and potentially causing damage. Always pre-freeze very moist foods or use a paper towel to absorb excess liquid near the seal area to protect your machine.
How often should I clean my vacuum sealer’s gaskets?
It’s recommended to wipe down your vacuum sealer’s gaskets and vacuum channel after every use, especially when sealing moist or crumbly foods. A more thorough inspection for wear and tear should be done regularly, perhaps monthly, or whenever you notice a decline in performance.
What kind of bags should I use with my vacuum sealer?
You should always use vacuum sealer bags specifically designed for your machine, typically featuring a textured or embossed inner layer. These textures allow air to be effectively drawn out during the vacuuming process. Generic or smooth bags are generally not compatible and will prevent proper suction.
My vacuum sealer makes a noise but no suction happens. What’s wrong?
If your vacuum sealer motor runs but no suction occurs, it strongly suggests an air leak. This is almost always due to faulty gaskets (dirty, damaged, or misaligned), a wrinkled or punctured bag, or the lid not being fully latched, preventing the creation of a sealed vacuum chamber. Check these components carefully.